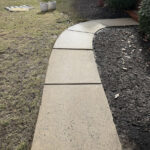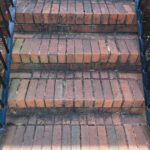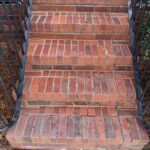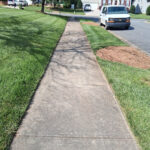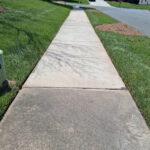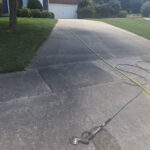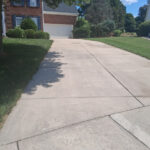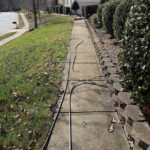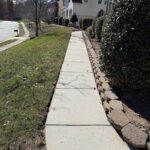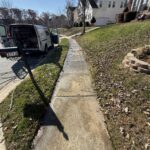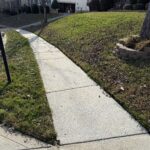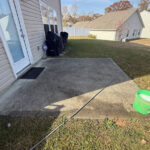
Professional Pressure Washing in Charlotte, NC.

Picture containing logo and the city of Charlotte, NC landmarks.

Driveway Pressure Washing & Concrete Cleaning in Charlotte, NC

Your driveway is one of the first things people notice about your home, yet years of dirt, algae, mold, and surface stains can leave it looking worn long before its time. At CLT Property Detailing & Pressure Washing, we provide professional driveway pressure washing and concrete cleaning throughout Charlotte, restoring driveways, patios, and brick pavers with commercial-grade equipment and nearly two decades of exterior cleaning experience. Whether you're preparing to sell your home or simply want cleaner curb appeal, we're here to help you achieve long-lasting, professional results.

Flat-Rate Pricing

I believe in honest, transparent pricing with no hidden fees, surprise charges, or high-pressure sales—just one simple flat rate you can trust before the work ever begins

100# satisfaction Guaranteed

I stand behind every Concrete Cleaning service I provide because your satisfaction is never a gamble. If you're not completely happy with the results, you won't pay a dime.

Free Driveway Cleaning

Looking for the best value? My flat $400 Soft House Wash rate, includes a professional driveway deep surface cleaning. NO ADDITIONAL COST

Driveway Pressure Washing, Done Right

A simple & transparent flat-rate for Charlotte, Homeowners

I believe homeowners deserve more than just a low price. I Feel homeowners deserve an experienced professional who consistently delivers high-quality results, stands behind their work, and provides honest, upfront pricing with no surprises. That's exactly how I've built my flat-rate concrete cleaning pricing scale..
🚗 Small Driveway-$125

Perfect for smaller residential driveways, or Patio. This Price is good up-to 500 sq ft of concrete, brick pavers, or any other flat hard surface on your property.

🚙 Medium Driveway-$200

Ideal for standard residential driveways, larger patios, and multiple connected hard surfaces. This flat rate covers 500–1,000 square feet of concrete, stamped concrete, or other flat exterior surfaces.

🚛 Large Driveway-$300

Designed for oversized driveways, expansive patios, and larger outdoor living areas. This flat rate covers 1,000–1,500 square feet of concrete, brick pavers, stone pavers, or other flat hard surfaces on your property.

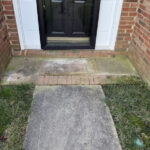
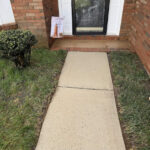
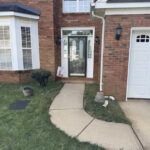
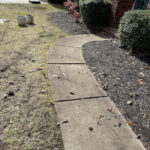
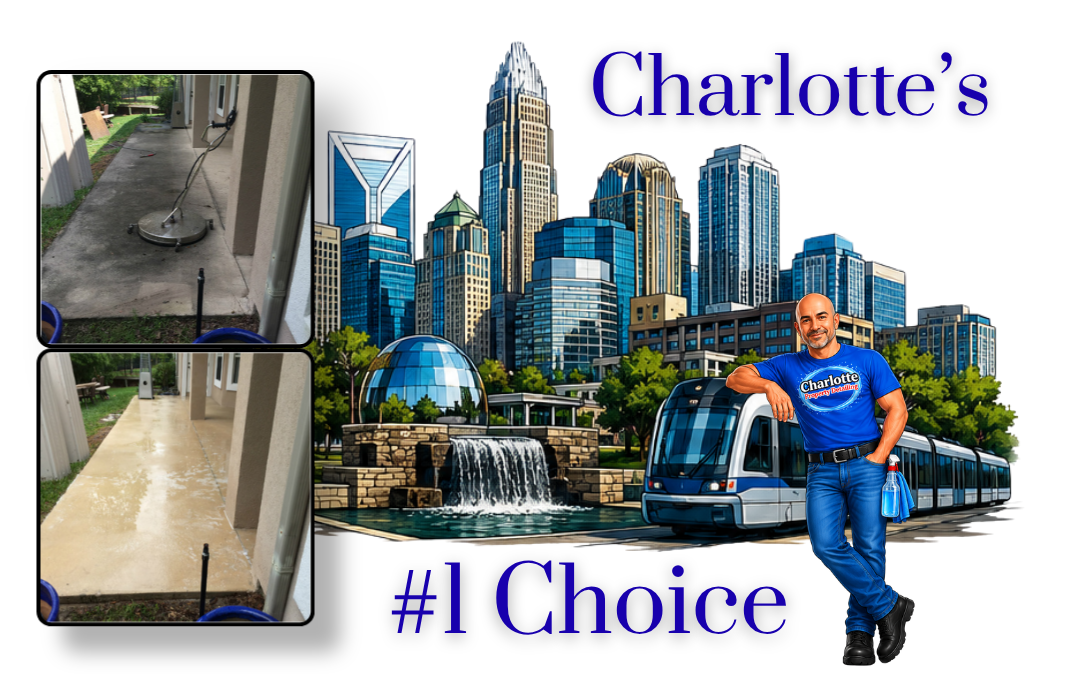
before and after pictures of concrete cleaning - Attached to artwork of up-town charlotte, nc.

See Why Charlotte Homeowners Trust CLT Property Detailing & Pressure Washing

Anyone can claim to deliver great results. I'd rather earn your trust by letting my Charlotte customers, real before-and-after transformations, and the reputable news organizations that documented my years of professional integrity and dedication to my craft speak for me.

Real Before & After Photos From My Charlotte Pressure Washing Projects

These are real before-and-after photos from pressure washing projects I've personally completed throughout the Charlotte area. No stock images, no staged examples, no lighting filters—just honest, documented results photographed on-site.
Meet Jerry Johnson

Hi, I'm Jerry Johnson, the owner and sole operator of CLT Property Detailing & Pressure Washing. I understand that hiring a new home service provider means trusting someone with one of your family's biggest investments—your home.

Jerry waving Hi in front of a Motor Speedway

I'm a Certified Career Exterior Cleaning Technician with nearly 20 years of professional experience. As an owner-operated business, you'll deal directly with me from your very first phone call to the day I personally arrive at your home and perform the pressure washing service myself.

If you're trusting me with your home, I think it's only fair that you know a little about the person behind the business. These videos offer a glimpse into my long career, my values, and the professional standards I've worked to uphold for nearly two decades.

How I Deliver High-Quality Hard Surface Cleaning in Charlotte

As a Certified Exterior Cleaning Technician who has completed several hundred hard surface cleanings—including concrete, brick, stone pavers, lannon stone, and travertine—I can confidently say that no single cleaning method is suitable for every surface.

In fact, the same equipment, cleaning solutions, and techniques that produce outstanding results on concrete can permanently damage more delicate materials that require a completely different approach. Understanding the unique characteristics of each surface is what separates a true exterior cleaning professional from someone who simply owns a pressure washer.  

Below, I'll walk you through the professional methods, equipment, and cleaning procedures I use for concrete, brick, natural stone, and other hard surfaces to ensure every material is cleaned safely while producing the highest quality results
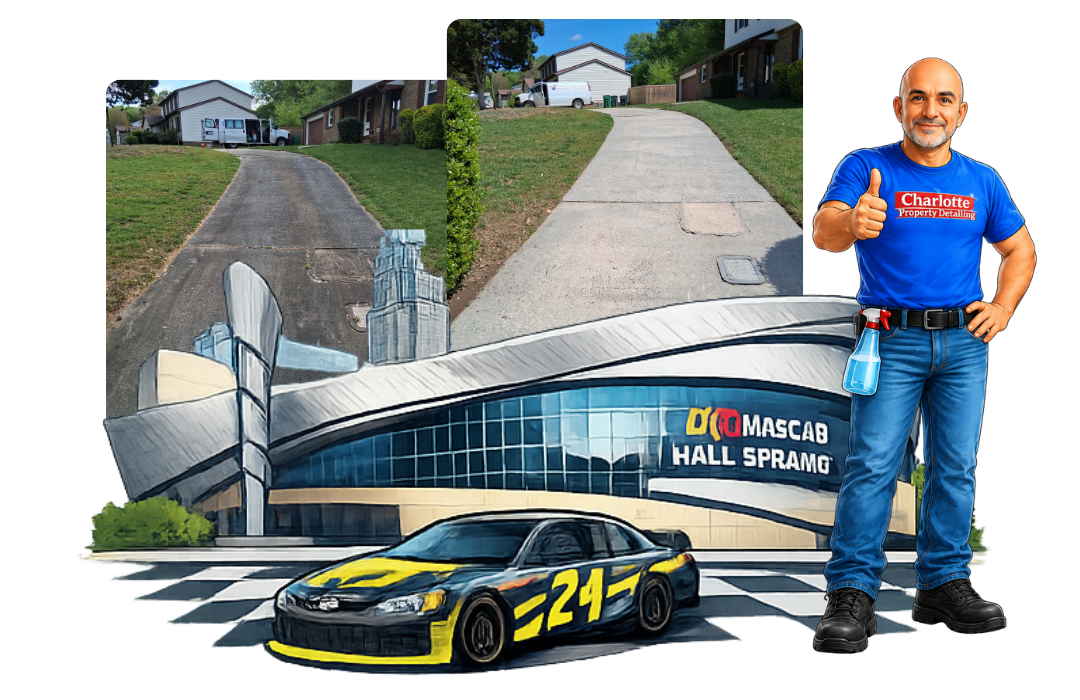
before and after pictures of driveway cleaning in highland creek, Charlotte - attached to artwork of jerry and racecar

Concrete Deep Surface Cleaning

Pre-Treating

Pre-treatin Concrete is one of the most durable exterior surfaces around, but producing a truly deep, even cleaning takes far more than simply blasting it with high pressure. My process begins by pre-treating the concrete with professional cleaning solutions that break down algae, mold, and other organic staining while penetrating deep into the surface to loosen years of embedded dirt before the actual cleaning begins.

Deep Surface Cleaning

Once the surface has been properly pre-treated, I use commercial-grade rotary surface cleaning equipment rather than a standard pressure washing wand. This allows me to clean the concrete evenly while reaching deep into the pores to lift out years of embedded dirt, mold, algae, and organic staining without leaving unsightly tiger stripes or missed areas.

Power Rinsing

As the rotary surface cleaner lifts years of embedded dirt, algae, mold, and other contaminants from deep within the concrete, those contaminants are brought to the surface. I then perform a thorough power rinse to completely wash away the loosened debris, revealing a deeply cleaned, evenly restored concrete surface free from streaks, tiger stripes, and leftover residue. 100% Guaranteed or your concrete cleaning is

Brick Pavers

Pre-Treating

Pre-treatin I begin by applying specially formulated brick cleaning solutions that penetrate the coarse texture of the brick, helping restore its original color while lifting years of embedded dirt and discoloration. I also apply professional algaecides to break down algae, mold, and mildew before any pressure washing begins, allowing the cleaning process to produce deeper, more even results with less reliance on excessive pressure.

Controlled Deep Cleaning

Using carefully controlled pressure based on the condition of the brick and the width of the joints allows me to thoroughly deep clean the pavers while avoiding unnecessary disturbance to the compacted base beneath them. While the joint sand that locks the pavers together will naturally need to be replaced after cleaning, protecting the base is essential to preventing future shifting, settling, and costly repairs.

Step 3 – Re-Sanding & Sealing

After the brick pavers have completely dried, I install fresh polymeric joint sand to restore the interlocking system that helps keep the pavers stable. Once the new sand has properly cured, a professional sealer can be applied to enhance the brick's natural color, help reduce future staining, inhibit weed growth, and extend the life of the installation.ed, evenly restored concrete surface free from streaks, tiger stripes, and leftover residue.

Natural Stone

Natural StoneNatural stone requires a completely different cleaning approach than concrete or brick. Many types of natural stone can be permanently etched, discolored, or even begin to flake if cleaned with the wrong pressure or cleaning solutions. Before any cleaning begins, I carefully evaluate the type and condition of the stone to determine the safest and most effective cleaning procedure. This allows me to restore the surface while protecting its natural beauty and structural integrity.

Surfaces I Professionally Clean

No matter whether it's a driveway, patio, walkway, sidewalk, or terrace, I have the knowledge, experience, and professional equipment to clean it safely and effectively. I stand behind every service I provide with my 100% Satisfaction Guarantee—if you're not completely satisfied with the results, your cleaning is free of charge.
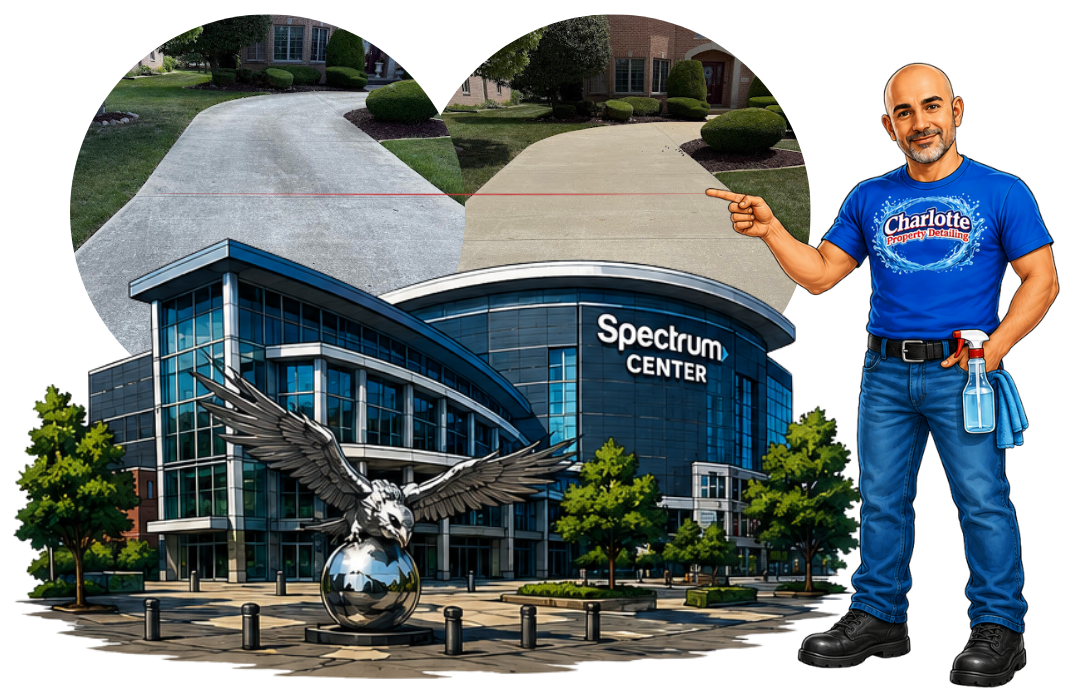
before and after picture of driveway pressure washing in Charlotte, NC - attached to artwork of Jerry pointing at pictures in front of a Arena in Charlotte, NC.

Let's Bring Your Property Back to Life

Great! We’ve received your information.

The Learning Center: Understanding Concrete Cleaning

Concrete is one of the most durable surfaces found around a home, but it's also one of the most misunderstood. From black staining and algae growth to rust, oil, red clay, and tire marks, many homeowners aren't sure what causes these stains, why some are easy to remove while others aren't, or how different cleaning methods affect the surface. The purpose of this Learning Center is to provide clear, unbiased information about concrete cleaning, helping you better understand the causes of common problems, the methods used to clean them, and what to expect whether you decide to clean your concrete yourself or hire someone else. Throughout this guide, you'll also find recommendations for tools, equipment, and products that can help you achieve the best possible results for different types of concrete cleaning projects

What Is Concrete Cleaning?

Concrete cleaning is the process of removing dirt, organic growth, stains, and other contaminants from the surface of concrete to restore its original appearance and help extend its service life. Depending on the type of staining and the condition of the concrete, cleaning may involve water, detergents, specialized cleaning solutions, mechanical agitation, or a combination of these methods.

Unlike many other exterior surfaces, concrete is highly porous. Tiny pores throughout the surface absorb moisture, dirt, organic matter, and other contaminants over time. As these materials become trapped within the pores, the concrete gradually loses its clean appearance and can develop discoloration that becomes more difficult to remove if left untreated.

Not all concrete staining is the same. Black algae, rust, oil, red clay, tire marks, efflorescence, paint, and other stains each have different causes and often require different cleaning methods. Understanding what caused the stain is one of the most important steps in determining the safest and most effective way to remove it.

Whether you're maintaining a driveway, sidewalk, patio, pool deck, garage floor, or another concrete surface, understanding how concrete behaves and why it becomes stained can help you choose the right cleaning approach and avoid unnecessary damage or disappointing results.
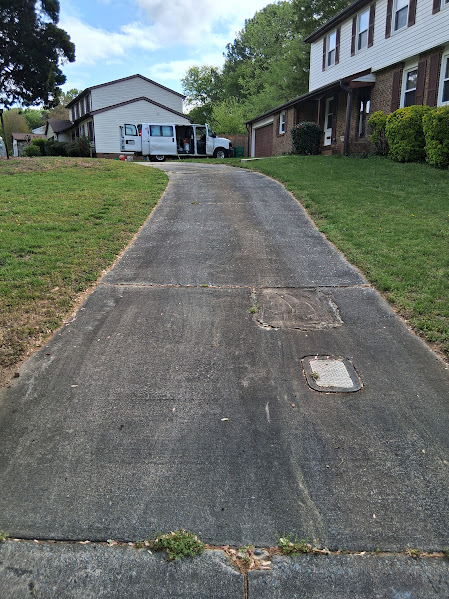
Very dirty driveway heavily stained with black staining before a deep surface cleaning.

Why Does Concrete Turn Black?

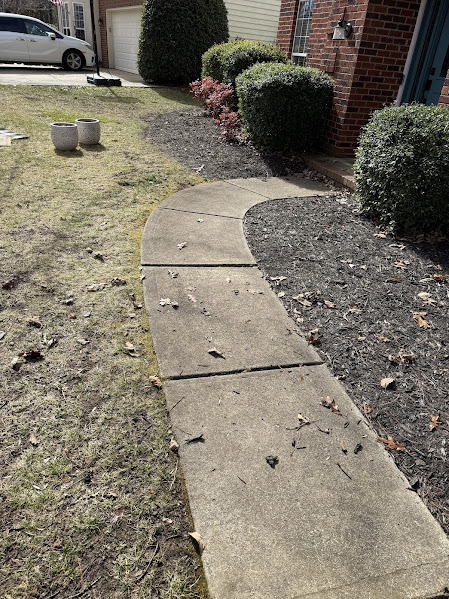
Charlotte Highland Creek Neighborhood Home's concrete walkway before surface cleaning

One of the most common questions homeowners ask is why concrete gradually changes from its original light gray color to a dark gray or black appearance. While many people assume the concrete itself is changing color with age, the darkening is usually caused by organic growth developing on and within the surface

Concrete contains thousands of tiny pores that readily absorb water and retain moisture. These damp conditions create an ideal environment for algae, mold, mildew, and other microorganisms to grow. As this organic growth spreads, it forms a dark layer that can eventually cover much of the surface

Shaded areas typically darken more quickly than areas exposed to direct sunlight because they remain damp for longer periods after rain, irrigation, or morning dew. Driveways beneath trees, north-facing walkways, and areas with poor drainage are especially susceptible to this type of staining.

As organic growth continues to develop, it penetrates deeper into the pores of the concrete. This is why older staining often becomes more difficult to remove than newer growth. What may begin as a few small dark spots can gradually spread across an entire driveway or patio if left untreated.

Although black staining is usually caused by organic growth, not every dark stain has the same origin. Tire marks, oil, grease, certain types of mold, and other contaminants can also discolor concrete. Correctly identifying the cause of the staining is the first step in choosing the most effective cleaning method.

Common Concrete Stains & How to Remove Them Yourself

Concrete can become stained by many different substances, and each type of stain requires a different approach for successful removal. Using the wrong cleaner can waste time, damage the surface, or even make certain stains more difficult to remove. In the following sections, you'll learn what causes the most common concrete stains, how to identify them, the best methods for removing them yourself, and the products that are commonly used to achieve the best results.

Black Algae Stains

Black algae stains are one of the most common reasons concrete gradually loses its bright, clean appearance. They typically develop in areas that remain damp for long periods, such as shaded driveways, sidewalks, patios, and pool decks. Because black algae are a living organism, simply spraying them with water often removes only the surface layer, allowing the staining to return more quickly

How to Remove Black Algae Stains Yourself

Black algae is an organic growth. The dark black or green staining you see on your driveway isn't actually the organism itself, but rather a protective layer it produces to shield itself from sunlight and other environmental conditions. The microscopic organism lives deep within the pores and tiny crevices of the concrete, where it continues to grow beneath the visible staining.

For that reason, your goal isn't simply to remove the black discoloration—it's to eliminate the organism itself. Doing so provides two major benefits:

It makes the cleaning process much easier by breaking down the algae at its source rather than trying to blast away the protective surface layer with pressure alone. 

It helps keep your concrete cleaner for longer because you're killing the algae instead of only removing the visible staining.Once the algae has been killed, the remaining staining can usually be removed with significantly less effort.
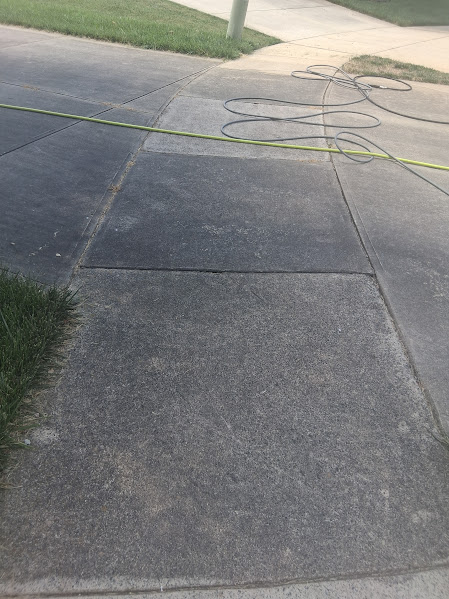
Matthews-NC-Sidewalk-Pressure-Washing-before

You'll find plenty of concrete cleaners on the shelves of your local home improvement store, but I'm only recommending the professional-grade products I personally use every day. I know they work because they've consistently delivered reliable results throughout my career cleaning concrete professionally.

At the end of this section, you'll find links to professional pressure washing supply stores where you can purchase the exact same sodium hypochlorite I use in my own business. If you're in the Charlotte area, I'll also recommend local pressure washing suppliers where you can buy it in person instead of waiting for shipping.

How to Clean Black & Green Algae Off Concrete, Brick & Stone Yourself

Understanding Sodium Hypochlorite Dilution

Professional-grade sodium hypochlorite is much stronger than the household bleach most people are familiar with. The product commonly sold at pressure washing suppliers contains approximately 10% to 12.5% sodium hypochlorite, which is far too strong to apply directly to most surfaces.

To safely and effectively clean black and green algae, the sodium hypochlorite must first be diluted with water. Dilution simply means reducing the concentration by mixing it with clean water. The goal isn't to use the strongest solution possible—it's to use the weakest solution that completely eliminates the organic growth.

For most black and green algae staining found on concrete, brick, and natural stone, a 2% to 4% sodium hypochlorite solution is an excellent starting point. Lighter staining typically requires less strength, while heavier staining may require a stronger mixture or a second application.

Adding a small amount of Dawn or Gain dish soap helps the solution cling to the surface longer, giving the sodium hypochlorite more time to work. The dish soap isn't the cleaner—its purpose is simply to slow runoff and improve dwell time
Finished Strength 12.5% Sodium Hypochlorite Clean Water
2%
Light algae
20 oz 108 oz
3%
Typical staining
31 oz 97 oz
4%
Heavy algae
41 oz 87 oz
5%
Very heavy growth
51 oz 77 oz

Each mixture makes approximately one gallon of finished cleaning solution. Swipe left or right to view the complete chart on mobile.

02

Step-by-Step Cleaning Process

Follow these steps to safely treat and clean black or green organic growth.

1
Inspect the Surface

Check for cracks, loose mortar, flaking stone, failing coatings, or other conditions that could be damaged during cleaning.

2
Remove Loose Debris

Sweep away leaves, dirt, sticks, furniture, planters, and anything else that may interfere with cleaning.

3
Protect Nearby Landscaping

Thoroughly wet surrounding grass, flowers, shrubs, and plants with clean water before applying the solution.

4
Prepare the Cleaning Solution

Use the dilution chart above to prepare the appropriate sodium-hypochlorite strength for the level of organic growth.

5
Apply the Solution Evenly

Use a chemical-resistant pump sprayer to coat the stained area without allowing the solution to drift onto unintended surfaces.

6
Allow Time to Dwell

Let the solution remain on the surface while keeping it from drying. The black or green staining should begin to lighten.

7
Clean With Controlled Pressure

Use a surface cleaner or appropriate pressure-washing tip to remove the loosened contamination without damaging the surface.

8
Rinse Thoroughly

Rinse the pavement, nearby structures, and surrounding landscaping with plenty of clean water.

9
Inspect the Results

Allow the surface to begin drying, then inspect it for remaining organic staining that may require another treatment.

Professional Tip: Allow the cleaning solution to do most of the work. Increasing pressure should not be your first response to stubborn staining.
01

Supplies You Will Need

Gather everything before mixing or applying the cleaning solution.

12.5% Sodium Hypochlorite

Professional-strength sodium hypochlorite purchased from a pressure-washing supplier or Leslie’s Pool Supplies.

Clean Water

Used to dilute the sodium hypochlorite to the appropriate cleaning strength.

Chemical-Resistant Pump Sprayer

Choose a sprayer designed to handle bleach or sodium-hypochlorite solutions.

Garden Hose

Needed for wetting nearby plants and thoroughly rinsing the cleaned surface.

Pressure Washer

A residential pressure washer can be used to remove the loosened contamination.

Surface Cleaner or Appropriate Tip

A surface cleaner provides more even results on larger concrete areas.

Protective Equipment

Wear chemical-resistant gloves, eye protection, closed-toe shoes, long sleeves, and long pants.

Important: Never mix sodium hypochlorite with ammonia, acids, rust removers, or other cleaning chemicals.

Where to Buy Sodium Hypochlorite Near Charlotte

These are the local suppliers I recommend for purchasing professional-strength sodium hypochlorite and exterior-cleaning supplies. Call before visiting to confirm current availability, container sizes, and concentration.

01
Professional Supplier
Pressure Washing Supply Store

Concord, North Carolina

A professional pressure-washing supplier offering sodium hypochlorite in convenient 5-gallon buckets, 55-gallon drums, and bulk tank fills. This is one of the best options for homeowners who want the same professional-strength product used by exterior-cleaning contractors.

  • Professional sodium hypochlorite
  • Five-gallon buckets available
  • Pressure-washing equipment and supplies
  • Bulk tank-filling service
Address 7140 Weddington Road, Suite 112
Concord, NC 28025
Phone 980-781-4221
Visit Supplier Website
02
Local Equipment Dealer
CSC Industrial Sales & Service

Indian Trail, North Carolina

CSC Industrial Sales & Service is a long-established local dealer serving professional pressure-washing and industrial-cleaning customers. It is a convenient option for homeowners in Indian Trail, Matthews, Monroe, and the southeast Charlotte area.

  • Professional pressure-washing supplies
  • Cleaning chemicals and equipment
  • Equipment sales and servicing
  • Convenient Indian Trail location
Address 198 Rowell Drive
Indian Trail, NC
Phone 704-821-1211
Visit Supplier Website
03
Multiple Locations
Leslie’s Pool Supplies

Charlotte-Area Locations

Leslie’s Pool Supplies may carry liquid pool chlorine containing sodium hypochlorite. This can be a convenient option for homeowners who do not live near a professional pressure-washing supplier.

  • Multiple Charlotte-area locations
  • Convenient homeowner-sized quantities
  • Pool and chemical-handling supplies
  • Online store locator available
Before Visiting Call the selected store and ask whether fresh liquid sodium hypochlorite is currently available.
Confirm Check the concentration printed on the container before using the dilution chart.
Find a Nearby Location
Important: Sodium hypochlorite loses strength as it ages, especially when exposed to heat or direct sunlight. Ask for the freshest product available and store it in a cool, shaded, well-ventilated location away from children, pets, metals, acids, ammonia, and other cleaning chemicals.

What Causes Rust Stains on Concrete?

Rust stains are the orange, reddish-brown, or dark-brown marks commonly found on concrete, brick, pavers, and other masonry surfaces.

These stains form when iron or metal is exposed to water and oxygen and begins to oxidize. The resulting rust can soak into the pores of the pavement, creating a discoloration that ordinary pressure washing usually cannot remove.

Common Causes of Rust Staining
Metal patio furniture
Iron-containing fertilizer
Well water and irrigation systems
Metal planters and decorations
Nails, screws, and landscape edging
Rusting tools or equipment
Exposed or deteriorating rebar
Metal runoff from nearby surfaces
Important: Rust is a chemical stain, not organic growth. Sodium hypochlorite will not remove it, and excessive pressure can permanently damage the surface while leaving the stain behind.
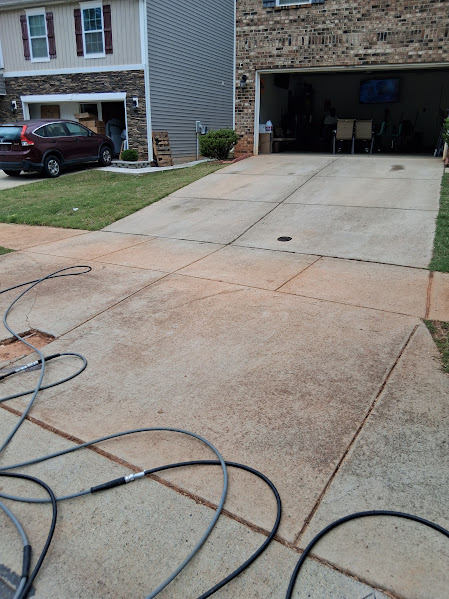
A Before Picture of a rust removal project in Charlotte, NC.
Important to Know
Why Pressure Washing Alone Will Not Remove Rust

Rust is a chemical discoloration that forms within the pores of concrete, brick, pavers, and other masonry surfaces. Because the stain is not simply sitting loose on top of the surface, water pressure alone usually cannot remove it.

Increasing the pressure may lighten the surrounding pavement, but it can also etch concrete, expose aggregate, damage mortar joints, or leave behind a permanent cleaning mark while the rust stain remains visible.

!

Rust must be treated with a cleaner specifically formulated to react with and release iron staining from the surface. Once that chemical reaction has taken place, the remaining residue can be rinsed away with clean water.

DIY Rust Removal
How to Remove Rust Stains Yourself

Rust stains should be treated with a cleaner formulated to dissolve iron staining rather than with sodium hypochlorite or additional water pressure. For this process, the product I recommend is F9 BARC by Front 9 Restoration.

1
Clean the Area

Remove loose dirt, leaves, and debris from the stained surface.

2
Test a Small Area

Apply the product to a small, inconspicuous area before treating the entire stain.

3
Dampen the Surface

Lightly mist the stained area with clean water. The surface should be damp, but not heavily saturated.

4
Prepare F9 BARC

Dilute the product according to the manufacturer’s instructions for the surface and severity of the staining.

5
Apply It Evenly

Apply the solution across the entire rust stain rather than treating only the darkest section.

6
Allow the Chemical to React

Give the product time to react with the iron staining. The orange or brown discoloration should begin to lighten.

7
Reapply When Necessary

Stubborn or deeply embedded rust may require another application. Reapply the cleaner instead of increasing the pressure.

8
Rinse Thoroughly

Once the stain has disappeared, rinse the surface and surrounding area thoroughly with clean water.

9
Inspect After Drying

Allow the surface to dry completely before evaluating the final result or deciding whether another treatment is needed.

Important: Wear chemical-resistant gloves and eye protection. Do not combine F9 BARC with sodium hypochlorite, bleach, or other cleaning chemicals. Follow the manufacturer’s safety, dilution, and surface-compatibility instructions.
Product I Recommend

F9 BARC Rust Remover

F9 BARC by Front 9 Restoration is the rust remover I personally recommend for removing rust stains from concrete, brick, pavers, masonry, and many other exterior surfaces. It consistently produces excellent results and is the same product I trust when treating rust stains.

Best For
  • ✔ Rust stains on concrete
  • ✔ Brick & masonry
  • ✔ Concrete pavers
  • ✔ Irrigation rust stains
  • ✔ Fertilizer stains
  • ✔ Metal furniture stains
Recommended Places to Buy
🛒 The Power Wash Store

My #1 recommendation. They consistently stock F9 BARC and can ship it directly to your door.

Visit The Power Wash Store →
🏭 Front 9 Restoration

Purchase directly from the manufacturer if you prefer ordering from the source.

Visit Front 9 Restoration →
Good to Know: While some local pressure washing suppliers may occasionally carry F9 BARC, inventory is inconsistent and many stock alternative rust removers instead. I recommend ordering from The Power Wash Store or directly from Front 9 Restoration to ensure you're getting the exact product discussed in this guide.

Why These Stains Are So Difficult to Remove

Oil, grease, and automotive fluids create some of the most difficult stains to remove from concrete because they can penetrate deep into the surface instead of remaining on top. Fresh spills are usually easier to treat, while older stains may require repeated cleaning and may not disappear completely.

Unlike algae or rust, these stains are usually petroleum-based. Sodium hypochlorite will not dissolve them, and pressure washing alone can spread the contamination or remove only the surface residue while leaving the deeper discoloration behind.

!

The first step is identifying the fluid and determining whether the spill is fresh or has already soaked into the concrete.

01
Fresh Spills

Absorb as much of the fluid as possible before adding water or applying a cleaning product.

02
Older Stains

Use a strong degreaser formulated to break down petroleum-based contamination and help lift it from the concrete’s pores.

Common Sources

Oil, Grease & Automotive Fluids That Stain Concrete

These are some of the most common petroleum-based fluids and lubricants that leave dark, greasy stains on driveways, garage floors, parking areas, and other concrete surfaces.

Motor oil
Transmission fluid
Power-steering fluid
Brake fluid
Hydraulic fluid
Gasoline and diesel fuel
Cooking grease
Equipment lubricants
Fluids leaking from vehicles
Fresh spills should be treated immediately. Absorb as much liquid as possible before adding water, since rinsing a fresh spill can spread the contamination across a larger area.
Oil & Grease Removal

Why Caustic Degreasers Work So Well

Oil and grease do not mix with water. That is why simply spraying an oil stain with a garden hose or pressure washer usually removes very little of the actual contamination. Instead, the oil remains trapped deep within the pores of the concrete.

Caustic degreasers are designed to break down and emulsify petroleum-based oils and grease. In simple terms, they surround the oil and break it into microscopic droplets that can be suspended in water.

1
The Degreaser Breaks Down the Oil

The chemical loosens the petroleum contamination and helps release it from the concrete’s pores.

2
The Oil Becomes Suspended in Water

Emulsification allows the broken-down oil to mix with the rinse water instead of remaining bonded to the pavement.

3
Pressure Flushes the Contamination Away

After the degreaser has had time to dwell, a pressure washer can flush the emulsified oil and grease from the concrete much more effectively.

This is why a degreaser is normally applied before pressure washing instead of relying on high pressure alone.

Realistic Expectations: The older and deeper the stain, the more treatments may be required. Oil and grease that have remained in concrete for years may improve significantly but may not disappear completely.
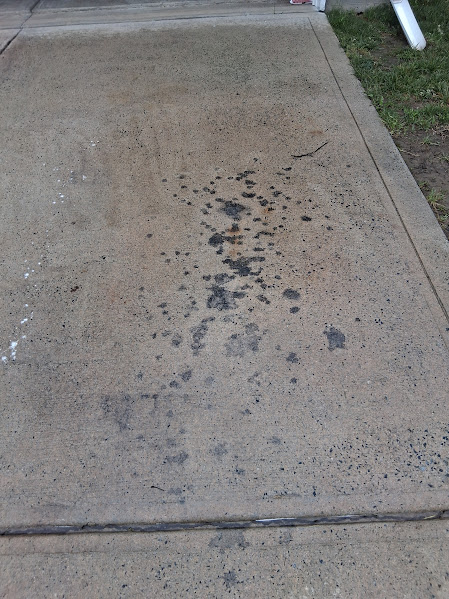
oil leak on a concrete driveway in Charlotte, NC
DIY Oil & Grease Removal

How to Remove Oil, Grease & Automotive Fluid Stains Yourself

1
Absorb Fresh Spills

For a fresh spill, cover the area with oil absorbent, clay-based cat litter, or another absorbent material. Allow it to pull up as much fluid as possible, then sweep it away before adding water.

2
Remove Loose Debris

Sweep the stained concrete to remove dirt, leaves, and loose material that could prevent the degreaser from reaching the oil.

3
Choose Your Degreaser

Use Gold Assassin for heavy or deeply embedded oil and grease stains. Use EBC when you prefer a non-caustic cleaner or are treating lighter contamination.

4
Test a Small Area

Apply the cleaner to a small, inconspicuous section first. Wear chemical-resistant gloves and eye protection while working.

5
Mix the Cleaning Solution

Dilute the selected degreaser according to the manufacturer's instructions for the severity of the stain and the surface being cleaned.

6
Saturate the Stain

Apply enough degreaser to completely cover the stained area. Extend the application slightly beyond the visible edges because the oil may have spread farther through the concrete than it appears.

7
Agitate the Surface

Scrub the treated area with a stiff nylon-bristle brush or deck brush. Agitation helps work the degreaser into the concrete's pores and loosen the embedded contamination.

8
Allow the Degreaser to Dwell

Give the cleaner time to break down and emulsify the oil. Keep the treated area wet and do not allow the degreaser to dry on the surface.

9
Pressure Wash the Area

Use a pressure washer or surface cleaner to flush the emulsified oil and loosened contamination from the concrete. Keep the equipment moving to avoid leaving cleaning marks.

10
Rinse Thoroughly

Rinse the treated area and the surrounding concrete with plenty of clean water until no cleaner or oily residue remains.

11
Repeat When Necessary

Older stains may require several applications. Reapply the degreaser and repeat the process instead of immediately increasing the pressure.

12
Inspect After Drying

Allow the concrete to dry completely before judging the results. Deeply absorbed oil may improve significantly without disappearing entirely, especially when the stain has remained untreated for a long period.

Important: Do not allow the degreaser or oily rinse water to enter storm drains. Follow all product instructions for protective equipment, dilution, surface compatibility, collection, and disposal.
Products I Recommend

Professional Degreasers I Recommend

Both of the products below are cleaners I recommend for removing oil, grease, and automotive fluid stains from concrete. Each has its own advantages depending on the type and severity of the staining.

1
Gold Assassin
Professional Caustic Degreaser

My first choice for heavy petroleum-based staining. Gold Assassin is formulated to break down and emulsify motor oil, grease, hydraulic fluid, and other automotive contaminants, making them much easier to remove with a pressure washer.

Best For
  • Motor oil
  • Hydraulic fluid
  • Heavy grease
  • Equipment lubricants
  • Older embedded stains
2
EBC
Professional Non-Caustic Cleaner

EBC is an excellent alternative when a non-caustic cleaner is preferred. It provides strong cleaning performance while being a less aggressive option for many residential applications.

Best For
  • Light oil staining
  • General grease
  • Routine maintenance cleaning
  • Non-caustic applications
Where to Buy

Both Gold Assassin and EBC can be ordered through The Power Wash Store. They stock both products and can ship them directly to your door.

Visit The Power Wash Store →
Charlotte-Area Staining

Red Clay Stains

Red clay stains are one of the most common exterior staining issues found throughout Charlotte and much of the Carolinas. Unlike algae, oil, or rust, red clay staining is caused by extremely fine clay particles that contain naturally occurring iron oxides.

As rainwater, foot traffic, vehicle tires, and construction activity move the clay across your property, these microscopic particles can become embedded deep within the pores of concrete, brick, pavers, natural stone, stucco, and other porous surfaces.

1
The Clay Is Moved Across the Property

Rainwater, muddy shoes, vehicle tires, lawn equipment, and construction activity carry fine red clay particles onto exterior surfaces.

2
The Particles Enter the Surface

Because concrete, brick, stone, and stucco are porous, the microscopic clay particles can settle into small pores and surface irregularities.

3
The Clay Dries and Bonds

Once the clay dries, the iron-rich particles bond tightly to the surface and leave behind orange or reddish-brown discoloration.

Common Charlotte-Area Issue: Red clay staining is especially common around new construction, unfinished landscaping, bare soil, drainage paths, and properties where clay is tracked onto pavement by vehicles or foot traffic.
Common Sources

Common Causes of Red Clay Stains

Red clay staining usually begins when fine clay particles are tracked or washed onto concrete and other porous surfaces. The following are the most common sources homeowners encounter throughout Charlotte and the surrounding areas.

New home construction
Construction site runoff
Bare soil around landscaping
Heavy rain washing clay onto driveways
Foot traffic tracking clay across sidewalks
Vehicle tires carrying clay onto driveways
Lawn equipment
Mud splashing onto foundations, patios & walkways
Tip: The sooner red clay is removed, the easier it usually is to clean. As the clay dries, the iron-rich particles settle deeper into the surface and become more difficult to remove.
Important to Know

Why Pressure Washing Alone Usually Doesn't Remove Red Clay

Although pressure washing can remove loose dirt and mud, it usually will not remove the iron-rich clay particles that have become embedded within the surface. Once the clay dries, it bonds tightly inside the pores of the concrete, making it much more difficult to remove than ordinary soil.

!
More Pressure Is Not the Answer

One of the biggest mistakes homeowners make is increasing the pressure in an attempt to blast the stain away. In many cases, this only removes a thin layer of concrete while the red discoloration remains, potentially leaving permanent cleaning marks or etched concrete.

1
The Stain Must Be Chemically Released

Red clay stains are typically removed with a cleaner specifically formulated to break down and release iron-rich mineral deposits from the surface before the remaining residue is rinsed away.

DIY Red Clay Removal

How to Remove Red Clay Stains Yourself

1
Remove Loose Clay and Debris

Sweep or rinse away loose dirt, dried mud, leaves, and other debris. The surface should be free of loose material before applying the cleaner.

2
Identify the Surface

Confirm whether you are cleaning concrete, brick, pavers, stucco, or natural stone. Product strength and surface compatibility may differ, especially on decorative finishes and acid-sensitive stone.

3
Test a Small Area

Apply the cleaner to a small, inconspicuous section first. Allow the test area to dry completely before treating the entire stain.

4
Prepare the Red Clay Cleaner

Use a cleaner formulated to release iron-rich clay and mineral staining. Dilute the product according to its instructions and the type of surface being treated.

5
Protect Nearby Surfaces

Wet nearby grass, plants, glass, metal, painted surfaces, and surrounding pavement with clean water. Keep the cleaner away from surfaces not included in the treatment area.

6
Apply the Cleaner Evenly

Apply the solution across the full stained area rather than treating only the darkest spots. This helps prevent uneven cleaning marks.

7
Allow the Cleaner to Dwell

Give the product time to react with the iron-rich clay particles. Do not allow the cleaner to dry on the surface unless the manufacturer specifically directs otherwise.

8
Agitate Stubborn Areas

Use a stiff nylon-bristle brush to work the cleaner into textured or heavily stained areas. Avoid wire brushes, which can damage the surface and leave metal particles behind.

9
Rinse Thoroughly

Rinse the treated surface and all nearby areas with plenty of clean water. Controlled pressure may be used after the chemical treatment, but the cleaner should do most of the stain-removal work.

10
Repeat if Necessary

Older or deeply embedded clay staining may require another application. Repeat the chemical treatment instead of immediately increasing the pressure.

11
Inspect After Drying

Allow the surface to dry completely before evaluating the results. Concrete and masonry often appear uneven or darker while still wet.

Important: Wear chemical-resistant gloves and eye protection. Never mix a red clay or mineral-stain remover with sodium hypochlorite, bleach, degreasers, ammonia, or other cleaning chemicals.
Product I Recommend

F9 Groundskeeper Red Clay Stain Remover

For removing red clay stains from concrete, brick, pavers, masonry, and other compatible exterior surfaces, I recommend F9 Groundskeeper by Front 9 Restoration.

F9 Groundskeeper is formulated to break down and release iron-rich red clay and mineral staining that ordinary pressure washing usually leaves behind. It allows the chemical treatment to loosen the discoloration before the surface is rinsed clean.

Best For

Red clay stains on concrete

Brick and masonry staining

Concrete pavers

Construction runoff stains

Iron-rich soil discoloration

Clay tracked onto driveways

Where to Buy

F9 Groundskeeper can be ordered through The Power Wash Store and shipped directly to your door.

Order From The Power Wash Store →
Important: Follow the manufacturer's dilution, safety, and surface-compatibility instructions. Always test a small, inconspicuous area first, especially on decorative concrete, natural stone, painted masonry, or specialty finishes. Never mix F9 Groundskeeper with sodium hypochlorite, bleach, degreasers, ammonia, or other cleaning chemicals.
Need More Help?

Still Have a Question?

I hope this Learning Center answered the questions you came here for. However, every property is different, and sometimes a stain does not fit neatly into one category.

If you are still unsure what you are dealing with, or you have a question that was not answered here, feel free to call or text me. I will do my best to point you in the right direction, even if you plan on cleaning it yourself.

Call or Text: (980) 290-8919

Whether you become a customer or not, I am always happy to help a homeowner better understand exterior cleaning.